Maybe you already know the six simple machines, but just in case you need a refresher they are the wedge, the wheel and axle, the inclined plane, the pulley, the screw, and the lever. It’s amazing to think that these were invented such a long time ago, but yet they still have such an impact on our modern world! The complex machines we use on a regular basis are merely just two or more of these simple machines that are working together. That’s pretty neat!
Wedge
The wedge is a simple machine that we’re likely to interact with on a daily basis. Think butter knives and scissors! While scissors are actually a combination of wedges and levers, it’s an awesome way to introduce the advantage of wedges to young learners. For this experiment, play dough, butter knives, scissors, door stops, and axe heads are needed. Anything that can easily be cut in half may be substituted for the play dough, but this is most readily available material that is generally mess-free. Get creative here! Could you use candles or cheese to experiment with wedges? The possibilities are endless. Students are given their choice of a wedge to use and tasked with splitting their ball of dough in half as evenly as possible. A small scale is used to help students weigh their two halves to encourage more accurate uses of their wedge. Each child is given the opportunity to try each type of wedge to determine which one makes the task easier or which one provides a more accurate result. Using the scale is optional, you can certainly still achieve success with wedges by safely guiding kids through experimentation with the various options.
Wheel and Axle
The wheel and axle is a common machine that we frequently use for transportation, so it’s easy to make connections to its mechanical advantage. For this experiment, students attempt to each move a heavy tool bag from one location to another. After everyone reaches the end, they are asked if anyone could move ALL the bags at once back to the starting point. Of course the children look at you with disdain and disbelief, but it’s the perfect opportunity to bring out a wagon for them to load all their bags into! Even the youngest child can then move the heavy weight with ease. We also used giant tinker toys (yes, you read that right) to help the students visualize how the wheel and axle interact and benefit one another. You can use wheelbarrows or moving dollies to elicit the same effect.
Inclined Plane
The inclined plane is one of the most fun and easy to grasp concepts for kiddos! It can be fun for us adults as well! Each student is given two small identical wooden blocks; the pairs are different from one another. A few minutes of self-guided learning results in the blocks stacked together in various ways with the students already experimenting with how far and fast toy cars can go. This visual component helps students understand how the height and length of the incline affects the speed and distance of their racers. It is easy to invoke some friendly competition by incorporating a stopwatch to time the cars or a piece of chalk to mark on the ground the distance traveled. Longer planks of wood and scrap siding from a building renovation are used to create a larger scale of an inclined plane. While using the downhill advantage for super fun, speedy races, the uphill inclined advantage is also important to understand and can be fun to teach. By using objects that are too heavy for the children to lift on their own, they can begin to understand how an inclined plane increases the mechanical advantage and helps make their work easier. Compare the two weights by using a pull scale (one lifting from the ground straight up, and the other from pulling the item up the plane) to guide children in figuring out which method is easier for them to use.
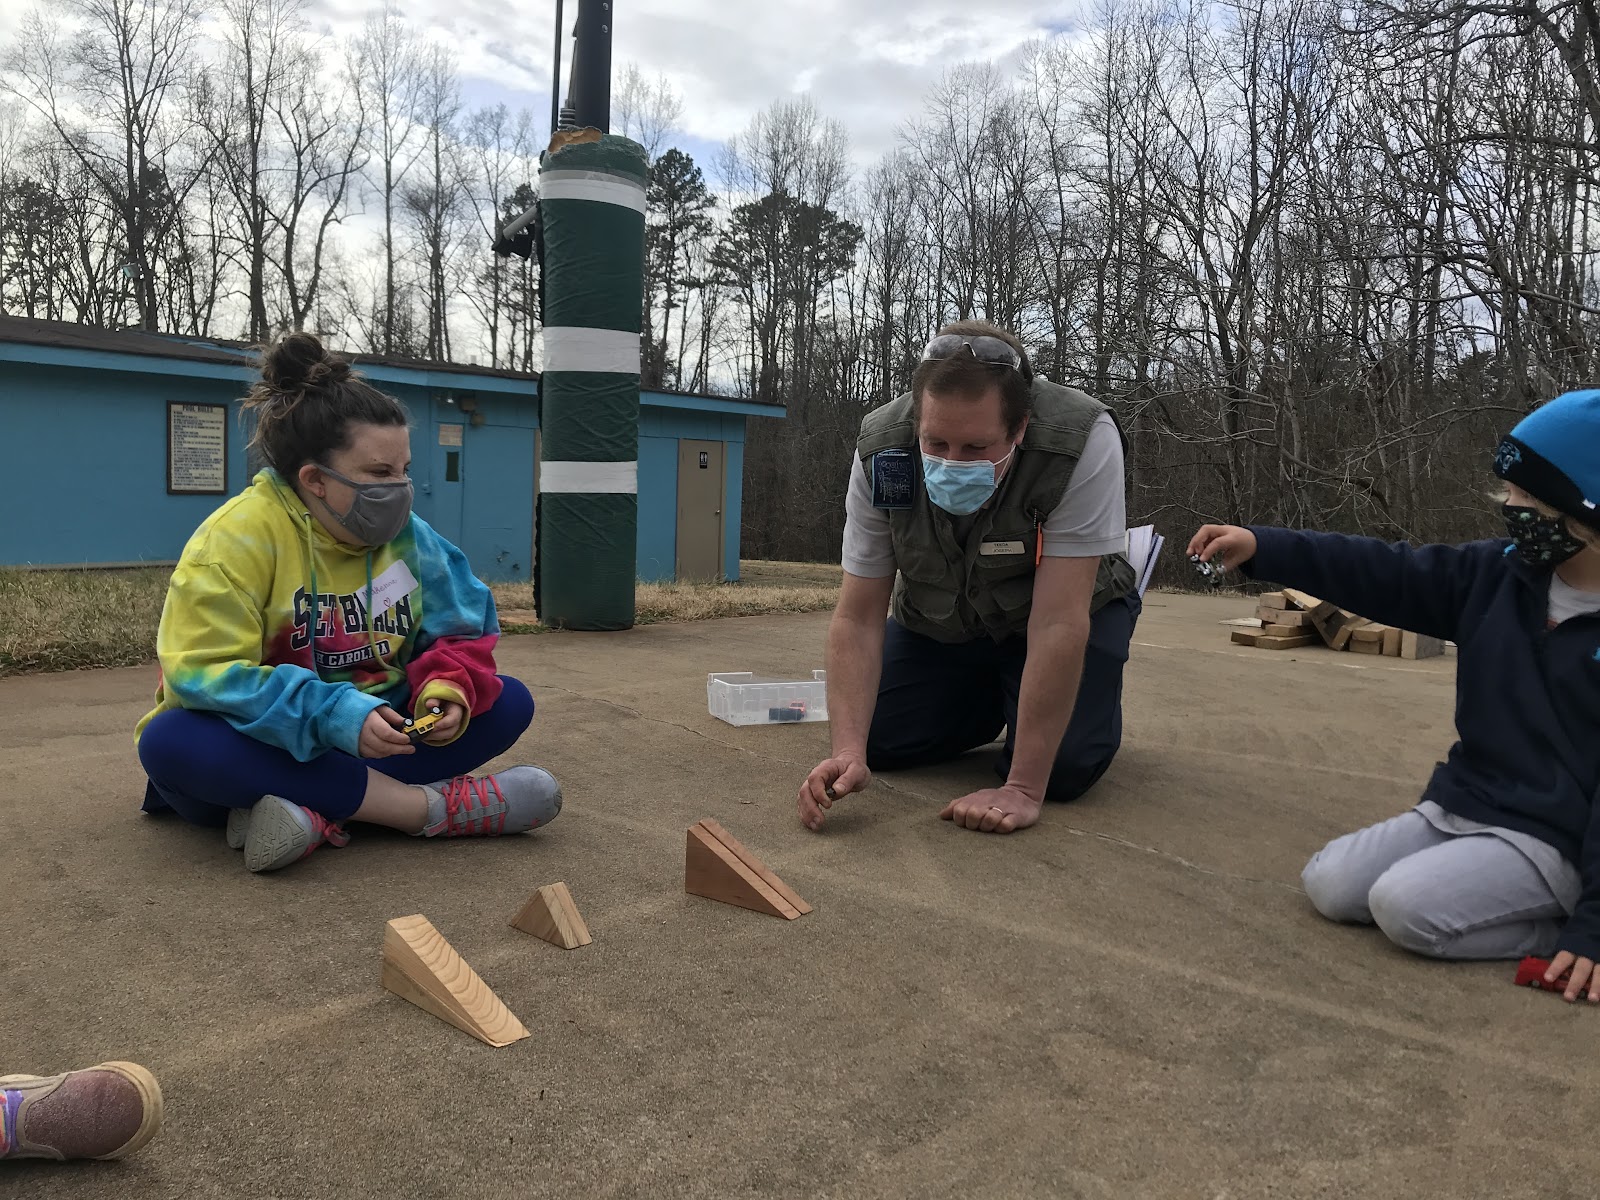
Mr. Joe teaching about the inclined plane!
Pulley
The pulley is an exciting, engaging machine to teach, and it offers room for flexibility depending on how many pulleys you have available. For the lesson at Foothills, we use pulleys differing in size totaling to ten pulleys. Fill a bucket with rocks or books (something that is too heavy for the children to lift on their own). Each student has an opportunity to lift the bucket straight up off the ground mostly to no avail. We offer experiments with fixed pulley systems, a block and tackle, and movable pulley systems. With the fixed pulley system, the pulley is attached to a stationary reinforcement. The rope moves through the pulley allowing for the direction of the object to change. Movable pulleys are attached to an object, and the two move together across a distance (think ziplines). A block and tackle is a series of pulleys working together to significantly decrease the force needed to move an object. By using a pull scale, students are able to measure the difference between lifting the bucket off the ground, lifting it using one fixed pulley, lifting it using two fixed pulleys, and lifting it using a block and tackle. Students use the movable pulley to transport objects back and forth between one another. This can be used as a fun means of communication by passing notes or toys across the room. A lesson on pulleys is easy to set up, and it provides a visual understanding of how using machines helps make our work easier.
Screw
The screw is merely an inclined plane wrapped around a cylinder, which when applied uses circular motion to move in a straight line. This one can be more difficult for students to grasp, but with a few different tools, they will be able to understand how this machine works! For this experiment, you need safety glasses, screwdrivers, hammers, screws, nails, and scrap wood. Prior to the experiment, screws and nails were secured into the pieces of wood. Students are able to practice with a screwdriver to see the motion and rotation of a screw. They can use a hammer (which is a lever), to practice removing nails from the wood. This comparison of nails and screws provides hands-on knowledge of the strength of using one versus the other. This activity is great for kids of all ages. Car jacks and bolts/washers are great examples of the screw, so if you have some of those handy, let your kids try them out!
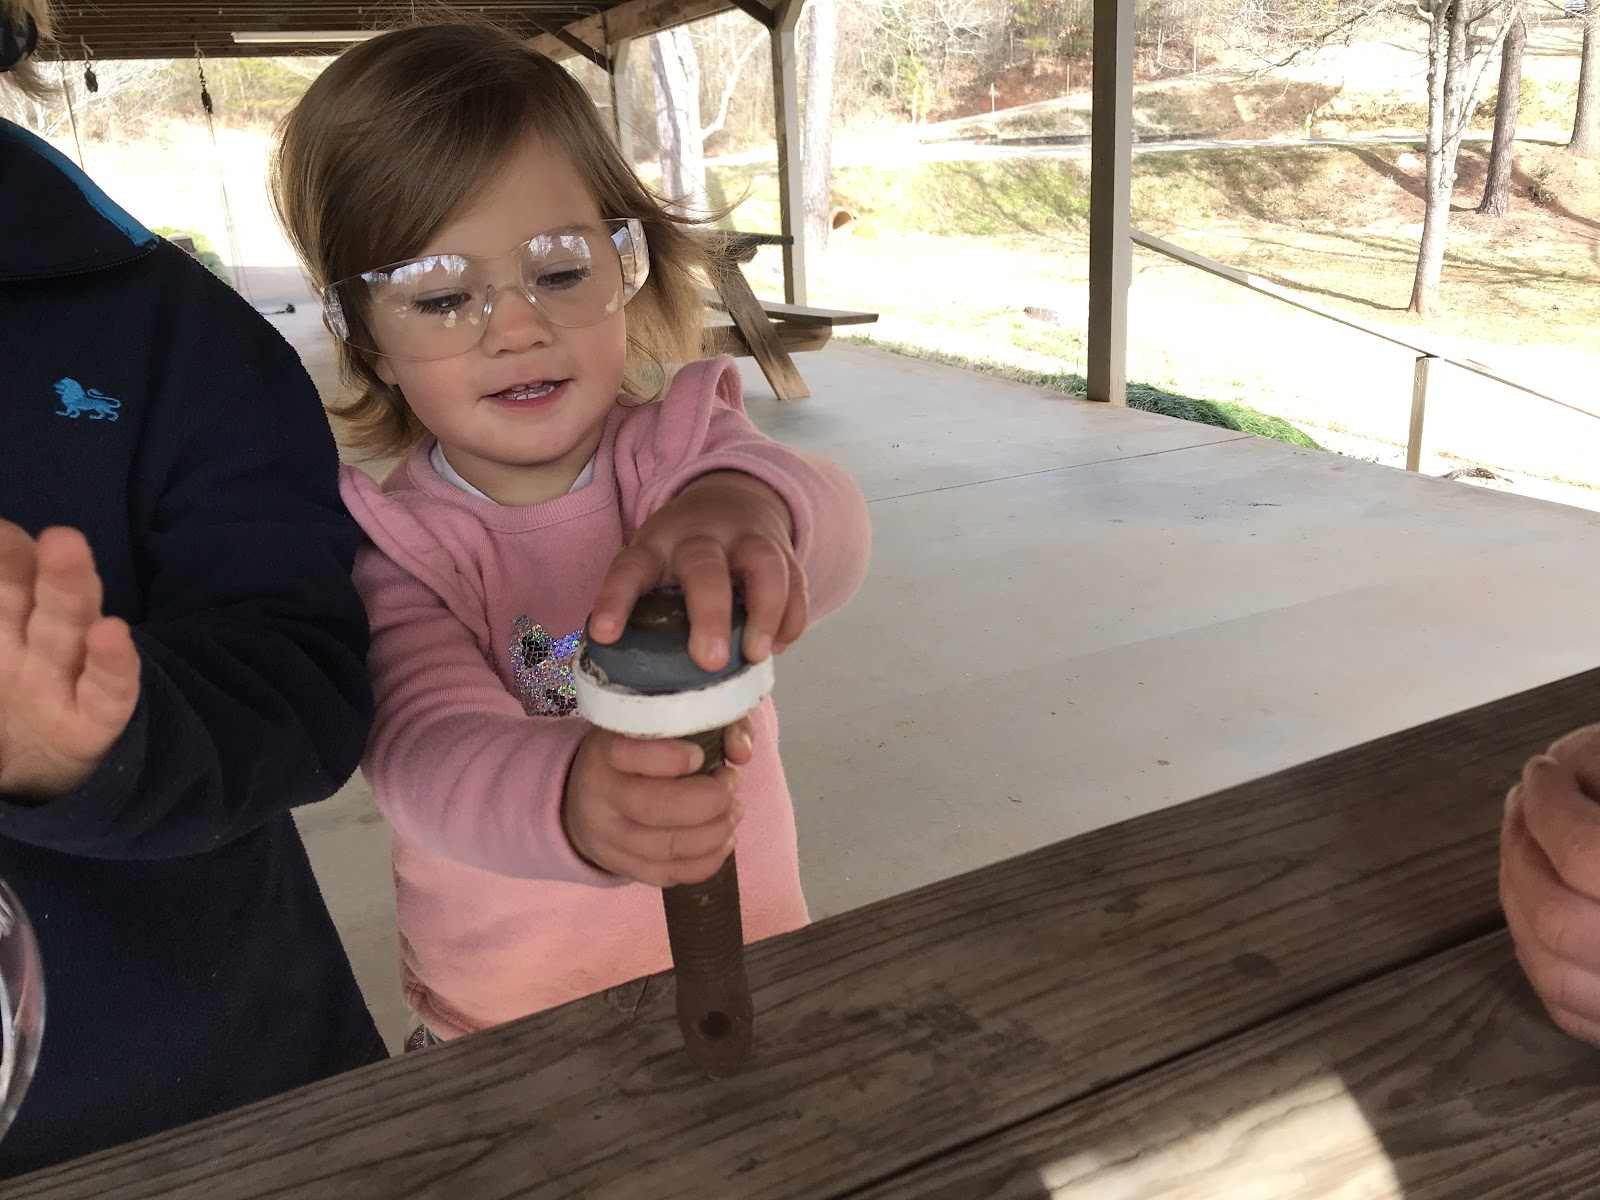
Look at that perfect form!
Lever
The lever is a great way to teach kids about mass, balance, and force. By using a small triangular piece of wood, a ruler, and a few washers, kids are able to quickly explore how moving the fulcrum (the hinge of the lever) can help balance objects of differing weights. The small-scale experiment precedes a seesaw experiment where kids can see the applicability of a lever lifting objects much too heavy for them to pick up on their own. For the larger lever experiment, a tire rim is used as the fulcrum and a plank of wood is placed on top. Any variation of materials will allow for similar results. Objects ranging in weight are provided to the students to allow them an opportunity to move the fulcrum in an attempt to balance the weight.
There are TONS of other ways to learn about the six simple machines, so take advantage of the materials you already have at home. Get creative! If you are interested in trying out the stated experiments, contact us at This email address is being protected from spambots. You need JavaScript enabled to view it. to ask questions or schedule a time to plan a visit. Happy experimenting!